

1.Data Management Platform
The Data Management Platform can be found at https://platform.rd-connect.eu/datamanagement/
You will need a list of the PhenoTips IDs corresponding to the genomic data you wish to submit.
There are 3 steps to submitting genomic data to the platform:
- Submit participant data (requires that PhenoTips entry is already complete)
- Submit corresponding experiment data
- Transfer genomic data files
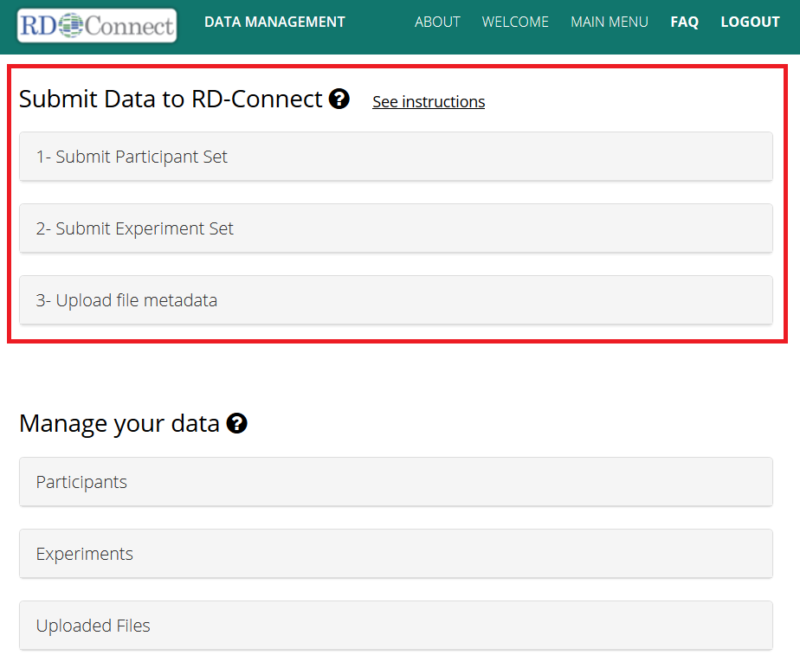
“Manage your data” is for previously submitted data.
2.Submit a new (set of) participant/s
First we need to collect the PhenoTips IDs for all the participants you are submitting in order to link the clinical data recorded in PhenoTips with the relevant sequenced data file.
You can also optionally record the Registry if the patient is registered to one, and provide permissions for the data to be made available for match-making with MatchMaker Exchange.
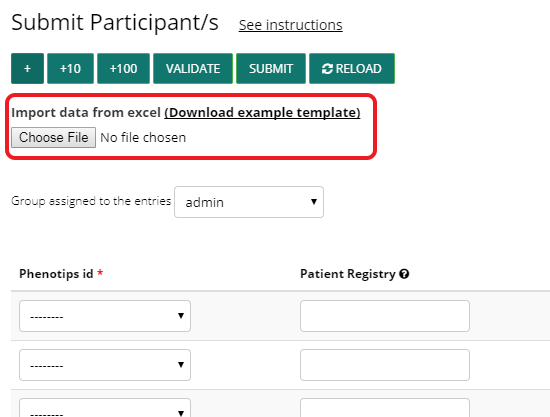
2.1.Manually entering participant information
If you only have a few participants to submit, you can manually enter the PhenoTips IDs here.
Select the group to which the participants you are submitting belong – the list of PhenoTips IDs shown in the drop-down box will contain only IDs belonging to this group in PhenoTips.
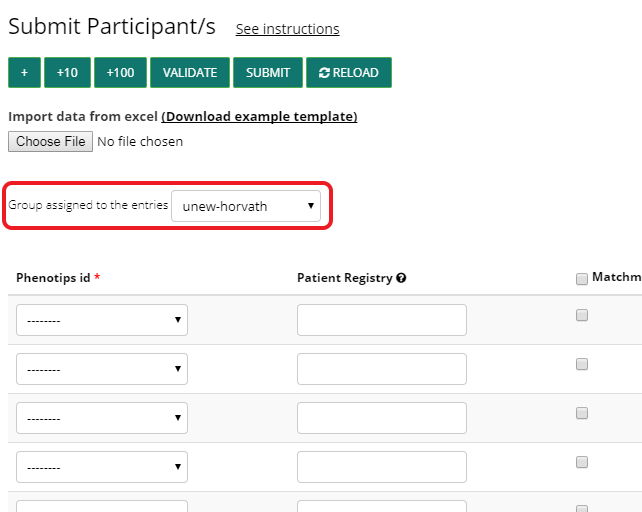
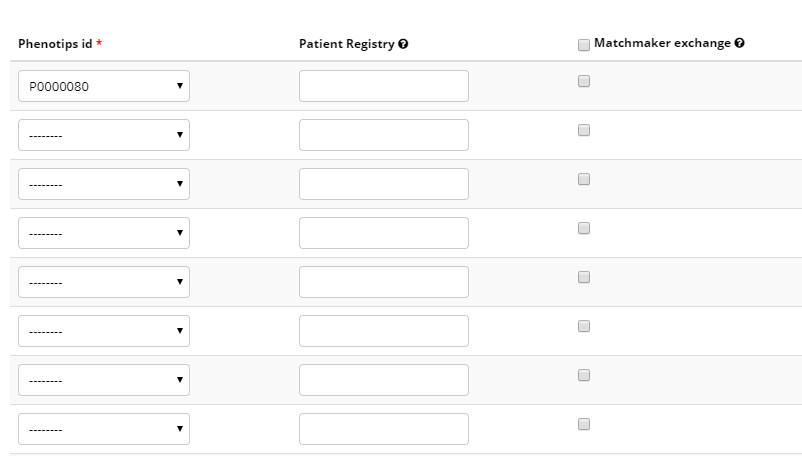
Select the PhenoTips ID for each participant from the drop-down menu (Phenotips id).
(Optional) If the patient is registered in a Registry, please enter the name of the registry in the Patient Registry column. Upon typing, the system will automatically search in the RD-Connect Registry & Biobank Finder and provide a list to select from. You may select more than one Registry.
(Optional) You can tick the checkbox to state whether you would like the participant to be made visible through the MatchMaker Exchange . This does not mean that all data will be visible, but Human Phenotype Ontology terms will be visible to external matchmaking tools when they attempt to make a match. You will be informed automatically by e-mail if an external match is made with one of your samples. Note you will not be able to attempt external matchmaking unless you tick this box.
When you have entered the information for all participants, click on Validate. The system will display the main information that you entered in PhenoTips for each of the participants. You should review that this looks correct and then click Submit.
You will then see the information you have saved and will have the option to download a corresponding CSV (Comma Separated Values) Excel file.
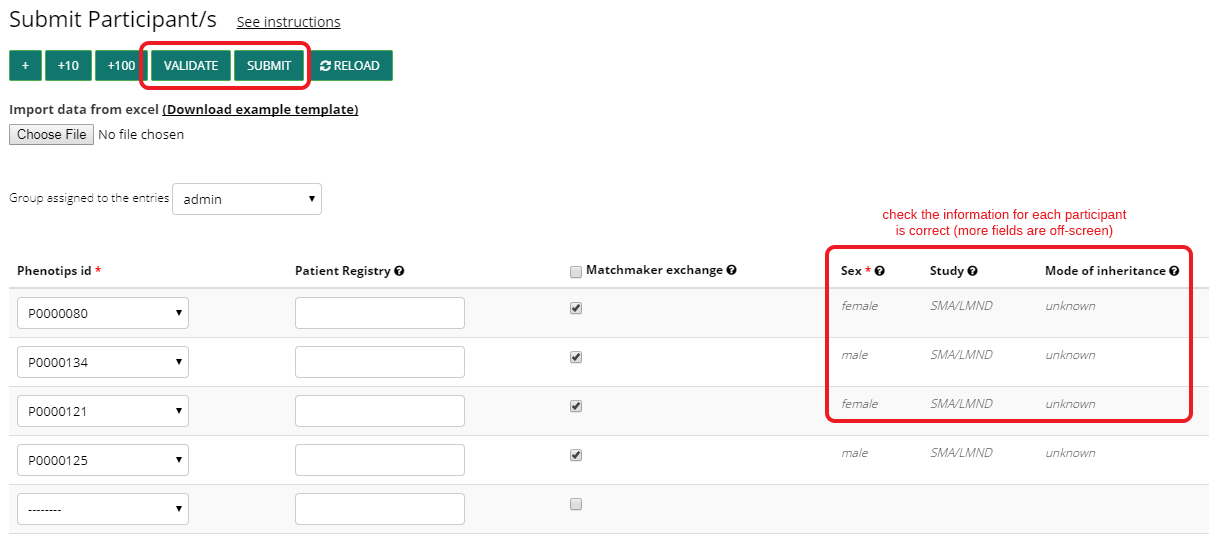
After you click on “Validate” you can review that the information pulled from PhenoTips is correct before clicking on “Submit”
2.2.Upload participant information with an Excel spreadsheet
If you have many participants to submit you can do so by uploading an Excel template.
First, select the group to which the participants you are submitting belong – the list of PhenoTips IDs shown in the drop-down box will contain only IDs belonging to this group in PhenoTips.
Click on Download Excel template to get an Excel template.
Complete the 3 columns appropriately by copy and pasting from your own sheet into the template, entering Yes or No for Matchmaking (MME), and save a local copy in TSV format on your computer.
See the next section, Generating a TSV file, for full instructions on creating this TSV file.
Return to your browser and click on Choose file then select the TSV you have just saved.
Check all data is correct, and click Submit.
2.3.Generating Tab-Separated-Value (TSV) format files for uploading metadata
If these instructions do not work with your spreadsheet tool, please let us know which tool you are using, with which operating system, by contacting help@rd-connect.eu
2.3.1.Using Libre-Office 5.x (tested on Linux)
- Complete all the metadata you wish to submit
- Make sure you have the first tab of the workbook open (i.e. the one with your metadata visible), then go to File and Save As…
- Change “All Formats” to Text CSV (.csv)
- Enter your filename and hit “Save”
- The “Export Text File” dialogue box will open. Here you should have Character Set set to Unicode (UTF-8), Text delimiter set to “ and you need to change Field delimiter to {Tab}
- Hit “OK”. You will probably get a warning that “only the active sheet is saved”, but that is what you expect. The file you generated will have a “.csv” suffix, but it will be tab-separated.
2.3.2.Using Microsoft Excel 2016
- Complete copy and pasting all the metadata you wish to submit from your own sheet into the template (step1-participant.xls)
- Make sure you have the first tab of the workbook open (i.e. the one with your metadata visible), then go to File and Save As…
- Next to the save type, where it currently says “Excel Workbook (*xlsx), select the drop-down and choose Text (Tab delimited) (*.txt)
- Enter a filename (or keep the current filename), and hit “Save”
- You will probably get a warning that “only the active sheet is saved”, but that is what you expect, and that some features may be lost using this text format.
- Hit “OK”. The file you generated will have a “.txt” suffix, but it will be tab-separated.
- When you close Excel it will ask if you want to save your changes. Just click “Don’t Save” as we have already done this.
2.3.3.Using Microsoft Office Plus 2016 (Excel v16.0.4266.1001) on Windows
- Complete all the metadata you wish to submit
- Make sure you have the first tab of the workbook open (i.e. the one with your metadata visible), then go to File and Save As…
- Change “Save as type” to Text (Tab delimited) (*.txt)
- Enter your filename and hit “Save”
- You will probably get a warning that “only the active sheet is saved”, but that is what you expect, and that some feature might be lost using this text format.
- Hit “OK”. The file you generated will have a “.txt” suffix, but it will be tab-separated.
3.Submit experiments
In this section we need to collect details about the experiments performed on the sample taken from the participant.
You can enter the details manually, although in most cases it will be preferable to use an Excel template as there are quite a few fields to complete.
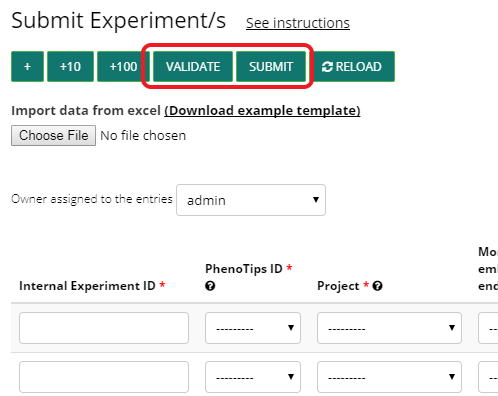
3.1.Manually entering experimental information
Select the group to which you wish to assign these experiments from the dropdown menu – this group will become the owner of these experiments.
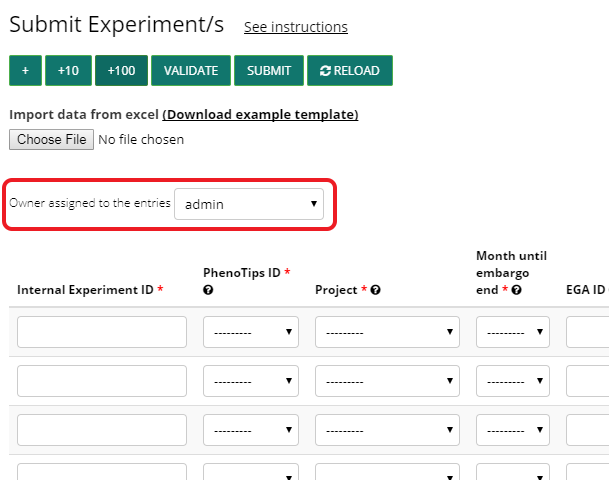
Enter your Internal Experiment ID (whichever ID you use to identify the sequenced data) and select the corresponding PhenoTips ID from the dropdown menu. Note that one participant can have more than one experiment e.g. WES/WGS/RNA-Seq, and each will need to have a separate entry. These will have the same PhenoTips ID but different Internal IDs as they will correspond to different files but the same person.
Select the Project to which this experiment should be assigned. If the Project is not listed, please contact platform@rd-connect.eu so that we can add it to the list.
Choose the number of months you wish this data to stay under an embargo period (visible only to the assigned group). You may select 0-6 months.
If you have already submitted the data to the European Genome-Phenome Archive (EGA; used as long term storage of data for RD-Connect), please enter the corresponding EGA Experiment ID (starts with EGAX).
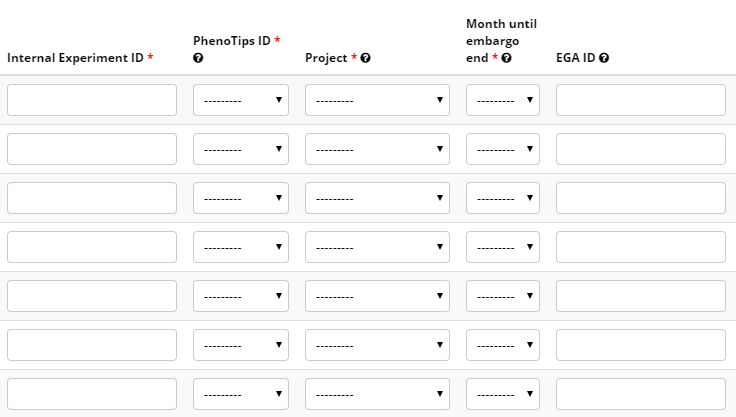
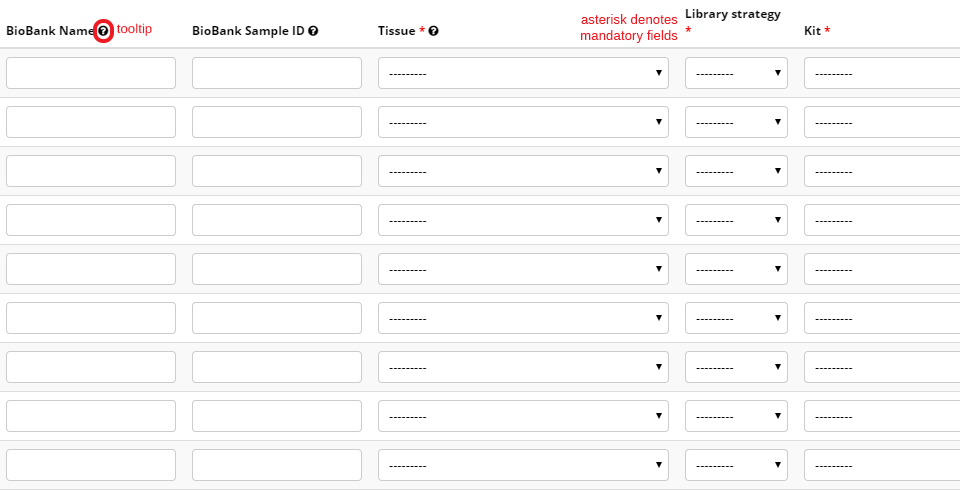
Complete the remaining fields for each experiment. Mandatory fields are denoted by a red asterisk. (see the ToolTips for more detailed information by hovering the cursor over the ? icon).
Click on Validate. The system will display the main information that you entered in PhenoTips for each of the participants.
Review the information you have entered to check that it is correct. Note that your experiments will be automatically assigned an RD-Connect ID (starts with an E)
Check all data is correct, and click Submit.
You will see the information you have saved and will have the option to download a corresponding MS Excel file for your records.
3.2.Upload experimental information with an Excel spreadsheet
Select the group to which you wish to assign these experiments from the dropdown menu – this group will become the owner of these experiments.
Click on Download example template to get the Excel spreadsheet to enter the submission information.
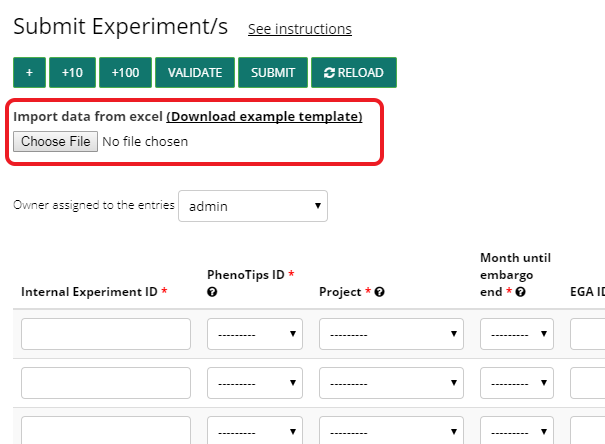
Complete one row per experiment. Mandatory fields are indicated in red. Save a local copy in TSV format on your computer.
See the section, Generating a TSV file, for full instructions on creating this TSV file.
Return to your browser, click on Choose File and select the sheet you have just saved.
Check all data is correct, and click Submit.
4.Upload your files with Aspera
If you have not installed the Aspera client already, please download and install Aspera Connect.
This is a browser plugin that enables high-speed file transfers between your computer and our server. You will need to restart your browser after installation.
4.1.Manually entering the information for your files
Select the Experiment ID for which you wish to upload data from the drop-down menu in the first column.
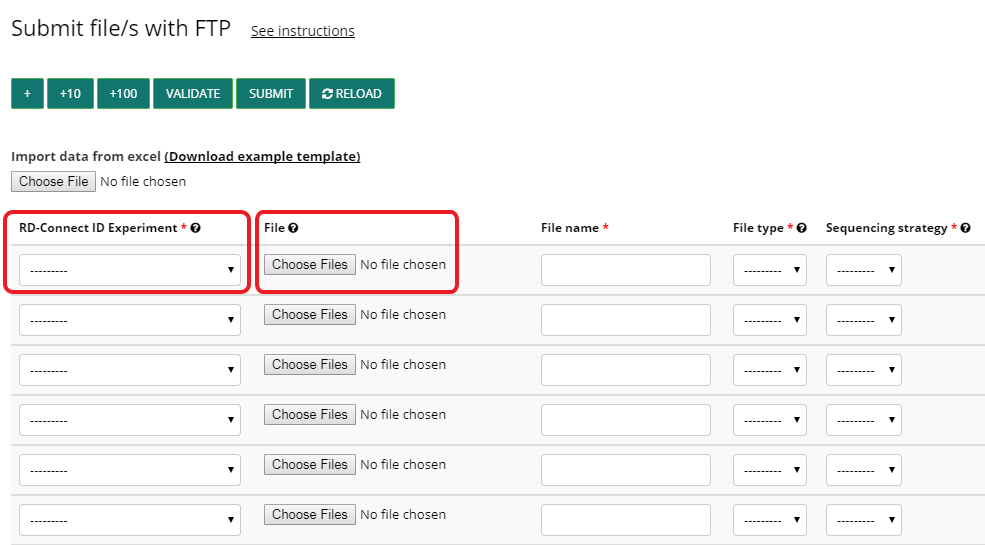
Click on Choose Files if you have them locally. You can select more than one file using the Ctrl button on your keyboard e.g. you will usually select a pair of files (or multiple pairs) when submitting FastQ data.
Note that only the following compressed formats are accepted: .fastq.gz, .fq.gz, .fastq.bz2, .fq.bz2, .bam
Complete the remaining fields for each experiment. Mandatory fields are denoted by a red asterisk.
Review that all the information you have entered to check that it is correct.
Click on Validate.
Check all data is correct, and click Submit.
You will see the information you have submitted, and have the option to Download as CSV, which is compatible with Excel.
Upon completion you will automatically receive an e-mail providing instructions as to how to transfer your data to the platform using our Aspera client service.
4.2.Using an Excel spreadsheet to upload your file information
Click on Download example template to get an Excel template to input your information.
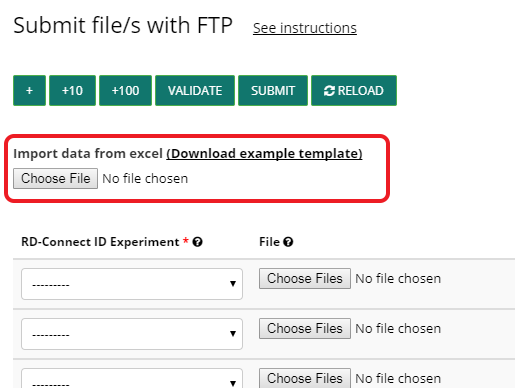
Complete one row per experiment. Mandatory columns are highlighted in red. Save a local copy in TSV format on your computer (See the section Generating a TSV file for full instructions on creating this TSV file).
Note that only the following compressed formats are accepted: .fastq.gz, .fq.gz, .fastq.bz2, .fq.bz2, .bam
Return to your internet browser and click on Choose File and select the sheet you have just saved.
Check all data is correct, and click Submit.
You will see the information you have submitted, and have the option to Download as CSV, which is compatible with Excel.
Upon completion you will automatically receive an e-mail providing instructions as to how to transfer your data to the platform using our Aspera client service.