

1.What is PhenoTips?
As part of the RD-Connect Genome-Phenome Analysis Platform, we will set up each of the associated projects with an account in the clinical database at PhenoTips.
Users will be expected to enter the phenotypic data which has been collected for each of the participants, even unaffected individuals (who just need to have a note to say they are unaffected), whose samples are being sent for sequencing as part of the project.
In order to do this you need to follow the instructions in this section.
2.Access
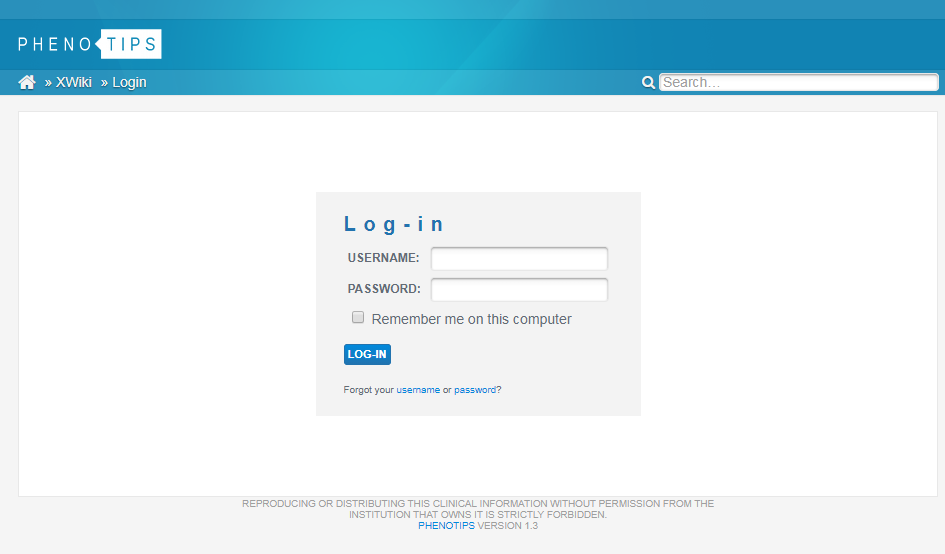
LOG-IN
Once you have been verified and registered with RD-Connect, you will receive your username and password.
Navigate to https://platform.rd-connect.eu/phenotips/ and log in with these credentials.
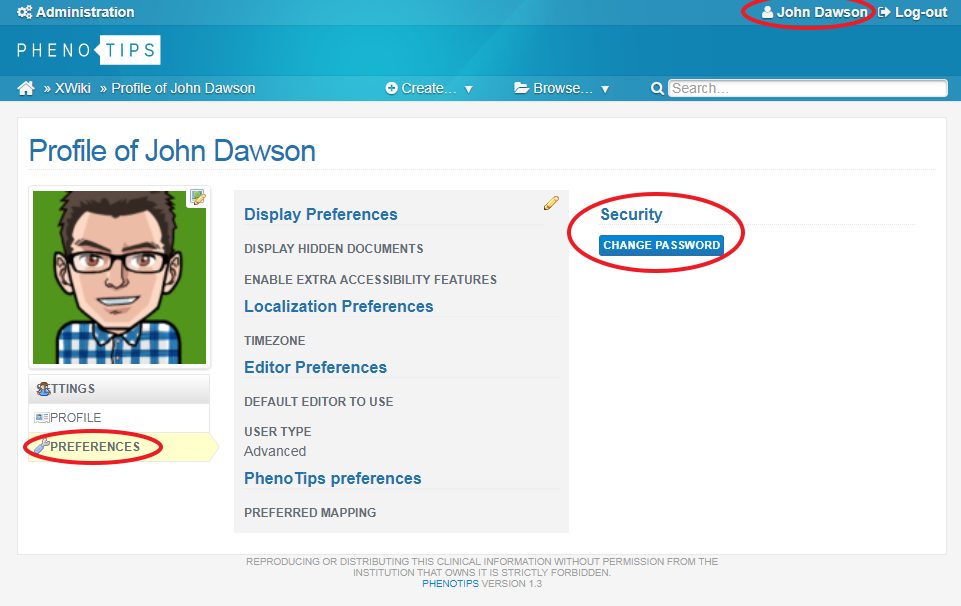
CHANGING YOUR PASSWORD
The first time you log in, you can change your password to something more memorable. To do this, click on your name at the top right of the screen, select Preferences on the left hand menu and choose Change Password.
3.Landing page explained
Whenever you want to return to the starting page, click the PhenoTips logo in the top left corner of the screen. This takes you to the home page which acts as a dashboard for the various features of PhenoTips.
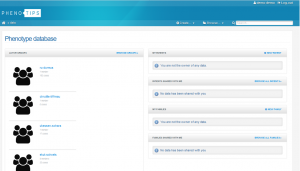
ACTIVE GROUPS
Here you can see who is a member of each group and how many cases belong to each. This is important for when you come to share your data with others.
Groups always have the format
Clicking on a group will open a new page with more details.
MY PATIENTS
This lists participant records you have already created.
You can open a record by clicking on it, and also sort the records by the ID, creator or creation date.
PATIENTS SHARED WITH ME
This lists participant records created by other users who have added you, or a group of which you are a member, as a collaborator.
MY FAMILIES
This lists Families that you have created using the Pedigree Editor. This will be covered later in the guide and is done when you create new participant records.
FAMILIES SHARED WITH ME
Lists Families created by other users who have added you, or a group of which you are a member, as a collaborator.
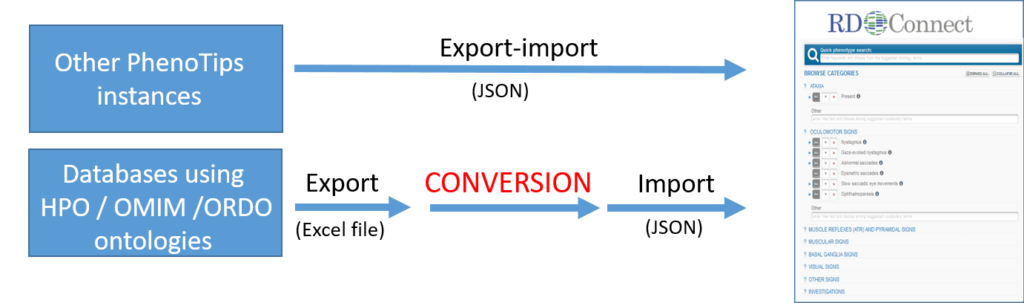
4.Entering patient records
There are two different approaches to enter phenotypic data in the system:
- Bulk-upload standarised phenotypic data from other sources
- Complete user friendly online templates in PhenoTips
Option 1 (bulk upload) is only available for submissions of high number of patients whose phenotypes are already HPO, OMIM and/or ORDO encoded in a specific database or file.
4.1.How to bulk-upload phenotypic data
This option is only available for submissions of high number of patients whose phenotypes are already HPO, OMIM and/or ORDO encoded in a specific database or file.
Contact platform@rd-connect.eu for any support during the process.
There are two ways of submitting data for bulk-upload:
4.1.1 If the data is already available in any other PhenoTips instance
You need to send 2 different files to platform@rd-connect.eu:
- The corresponding entries in a JSON format, including index cases and relatives from whom you will submit genomic data.
- The excel file “JSON bulk upload – Additional information” indicating which are index-cases, the affected/unaffected status, and local family ID (as this information is not present in the JSON file).
Once these files are successfully uploaded to our system, you will receive the corresponding RD-Connect patient identifiers from Phenotips.
This process will automatically generate pedigrees and Phenotips Family IDs only for the index cases. Therefore, after receiving the RD-Connect patient identifiers from Phenotips, you will need to link each of the relatives to their corresponding pedigree (see section 5.1).
4.1.2 If the data is already HPO, OMIM and ORDO encoded in a file or database
You will need to transfer the phenotypic information to the following excel file:
Bulk upload phenotypic data RD-Connect (v4)
- Include index cases and relatives from whom you will submit genomic data (one row per individual).
- Each family must have only 1 index case (for instance, if a family has 2 affected siblings the submitter must choose one of them as the index case in the form).
- Mandatory fields in red (this include a minimum of 5 HPO terms for index cases).
- Detailed description of each of the values requested can be found in line 2.
Once you have completed the excel file, you just need to send it to platform@rd-connect.eu and we will convert the excel file to a JSON format and import it to our PhenoTips instance. The corresponding RD-Connect patient identifiers will be sent to you once the data is successfully uploaded to our system.
This process will automatically generate pedigrees and Phenotips Family IDs only for the index cases. Therefore, after receiving the RD-Connect patient identifiers from Phenotips, you will need to link each of the relatives to their corresponding pedigree (see section 5.1).
Please note that after uploading the data to our system a quality control verification will be performed to ensure that minimum phenotypic requirments have been completed and additional information will be requested if missing.
4.2.How to create the patient records
To enter new participant data you can either click on NEW PATIENT at the top of the MY PATIENTS window, or you can hover over the + Create… dropdown menu at the top of the screen and select New patient.

We use the Human Phenotype Ontology (HPO) to record phenotypes for participants in order to match between cases.
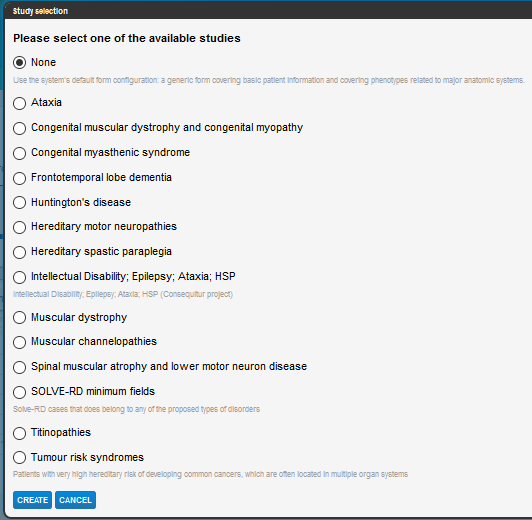
We have grouped some HPO terms that are relevant to particular diseases into Studies, so that if the record you are creating is relevant to one of the Study forms, you can select that and it will list the phenotypic terms appropriate for that case.
Select the disease (Study) form you wish to use, this will determine if the form will have sections specific to that disease, otherwise choose None or SOLVE-RD minimum fields (if the data you are submitting is part of this project), and click the Create button at the bottom of the window – a blank record will appear.
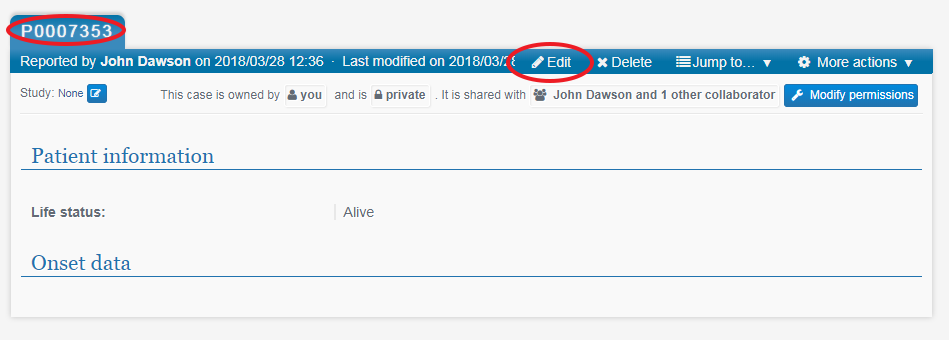
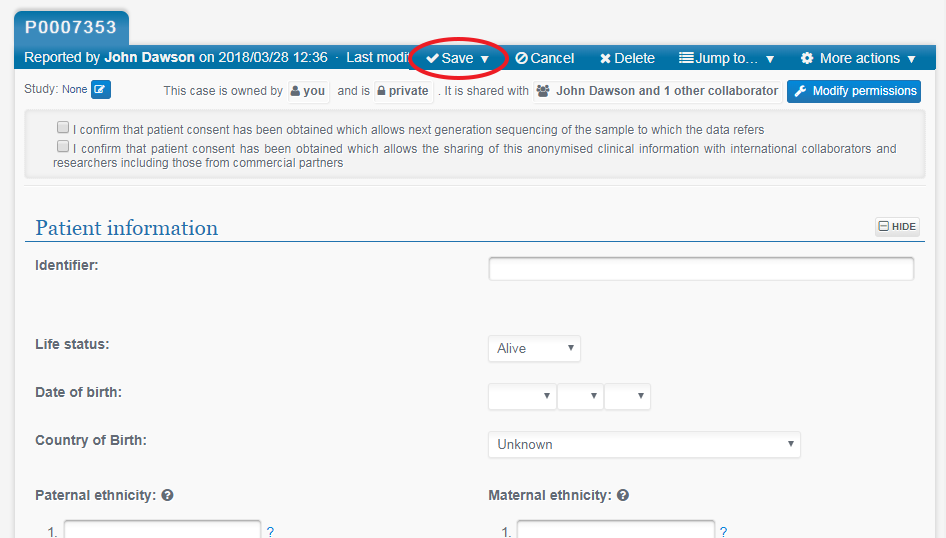
Enter your external ID code for this patient record in the Identifier field. Also make a note of the PhenoTips ID (top left of the window) for your records so that you know which PhenoTips ID corresponds to which of your own IDs.
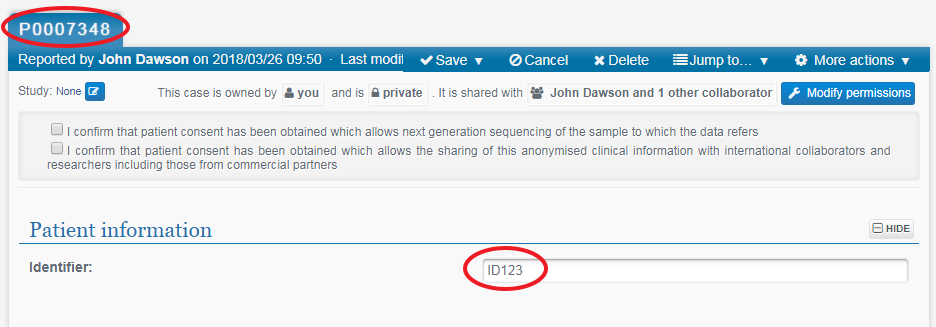
PhenoTips ID: P0007348 and sequencing Identifier: ID123
Continue through the form entering the patient information as required. For some fields you can click the ? or ! icon for further information.
Choose Y (affected) or N (unaffected) for Clinical status. This is mandatory so that we can differentiate between affected and unaffected individuals.
![]()
![]()
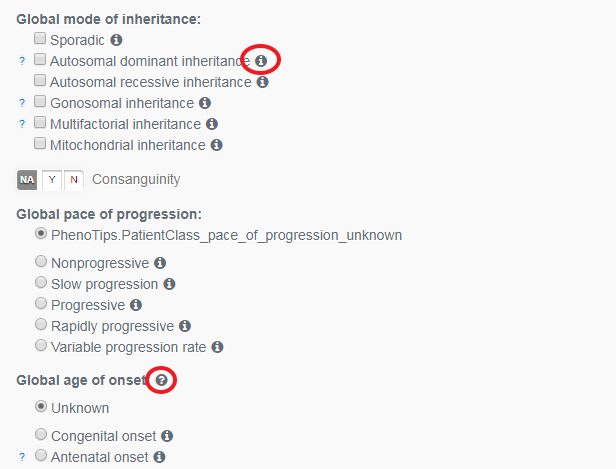
Now work through the Inheritance, Progression and Onset data. Indented descriptions are subcategories of those above. If you click on the little ‘info’ icon, a definition will pop-up.
Work through the rest of the form clicking on the headers to open out the sections of the form.
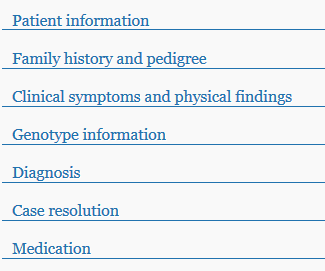
Where a triangle exists beside an observed phenotype, clicking on it will reveal sub-categories. Some of the sections may or may not be visible depending on the Study you selected.
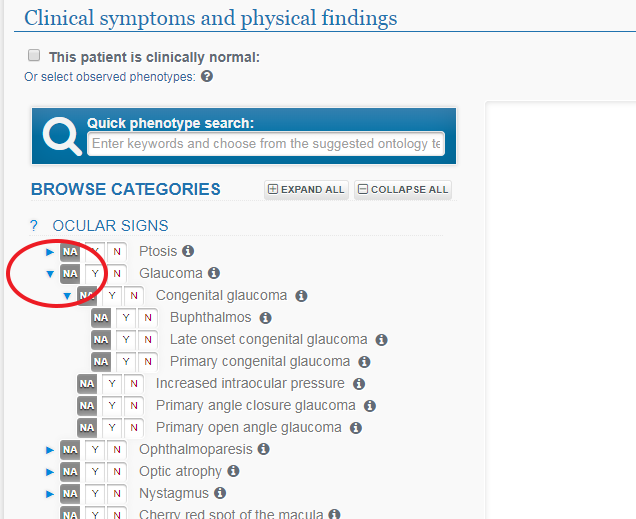
Click on any arrows to expand sub-categories
5.Using the Pedigree Editor
You must now enter the known relations of the participant by clicking on Draw pedigree. If you do not know of any of the relations, please create a pedigree anyway by using the first available template that pops up for a single individual (see below). This is important for us to monitor the number of index cases and families in the system to make it more effective.
The “Clinical Status” (Affected/Unaffected) should be introduced for each participant through their main records, not through the pedigree (see Section 4.2).
A window will pop up and you should select Create a new family, unless the family already exists in the system.
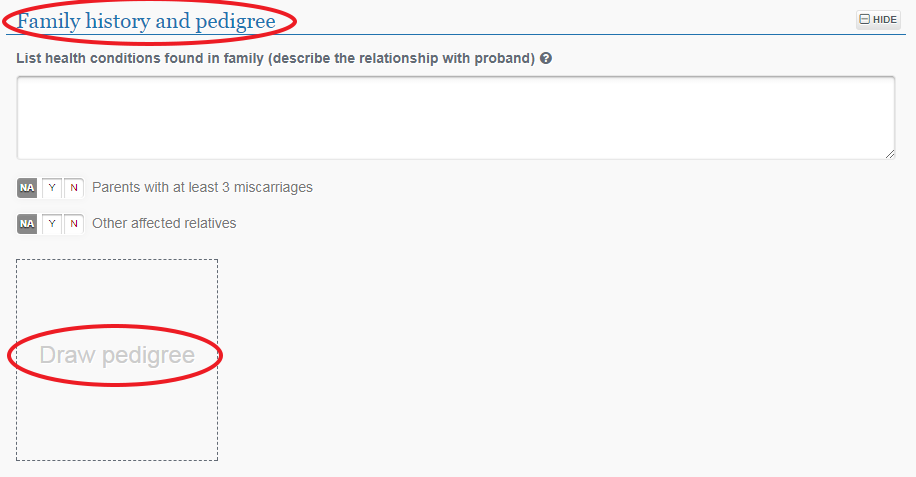
Click the “Family history and pedigree” section title to expand the section, then click on “Draw pedigree” to create a new family for this index case
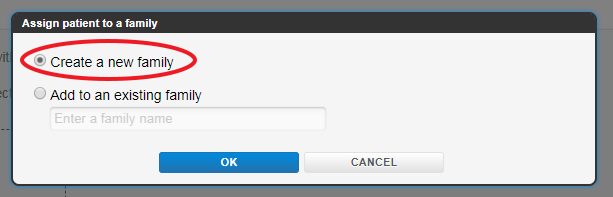
Usually this will be the record for the index case so you will be making a new family diagram by selecting “Create a new family”; if you are adding a new member to an existing family you will select “Add to an existing family” and enter the Family ID here.
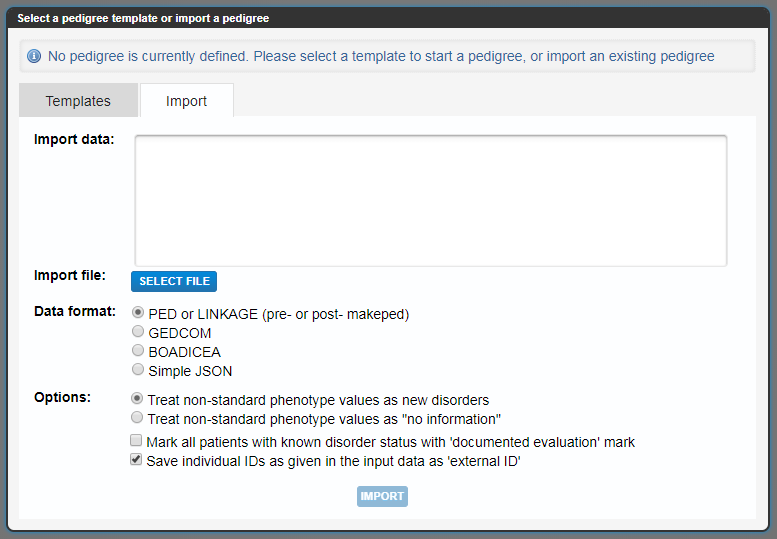
Select the most appropriate template for the family, or click on Import to pull in existing data if it is in one of the supported data formats.
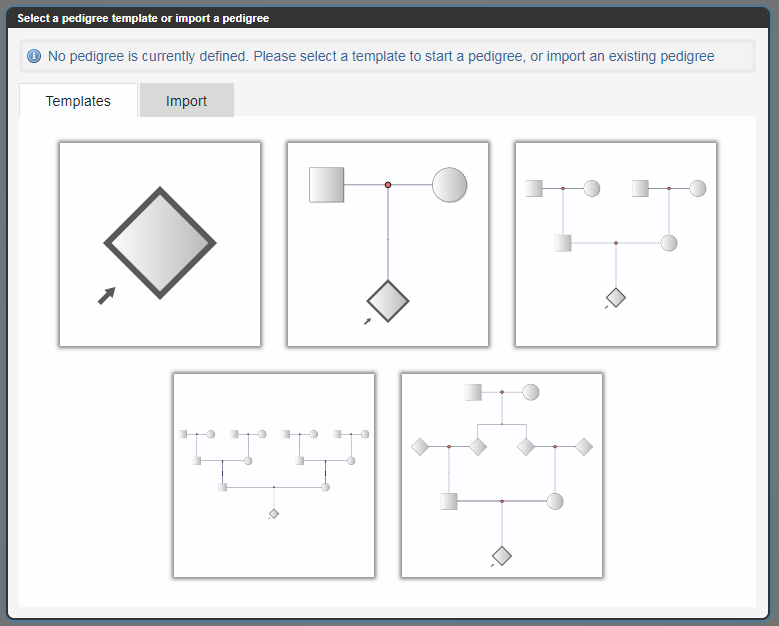
You can select an appropriate pedigree template or start with a single node and add other branches manually
If you hover over one of the nodes in the pedigree, you can add more relatives by selecting the relevant branch that ends with a blue button
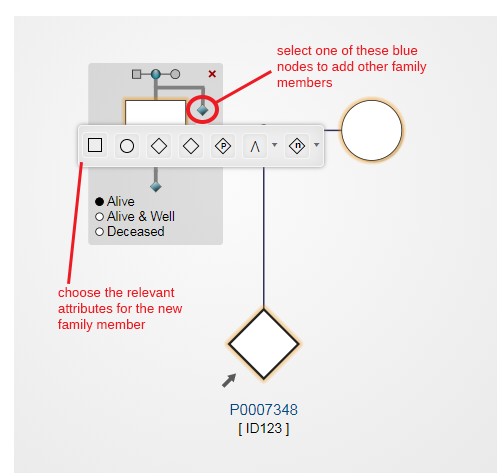
Selecting the highlighted node will add a sibling

After choosing a sibling node (highlighted yellow), parent nodes are automatically added
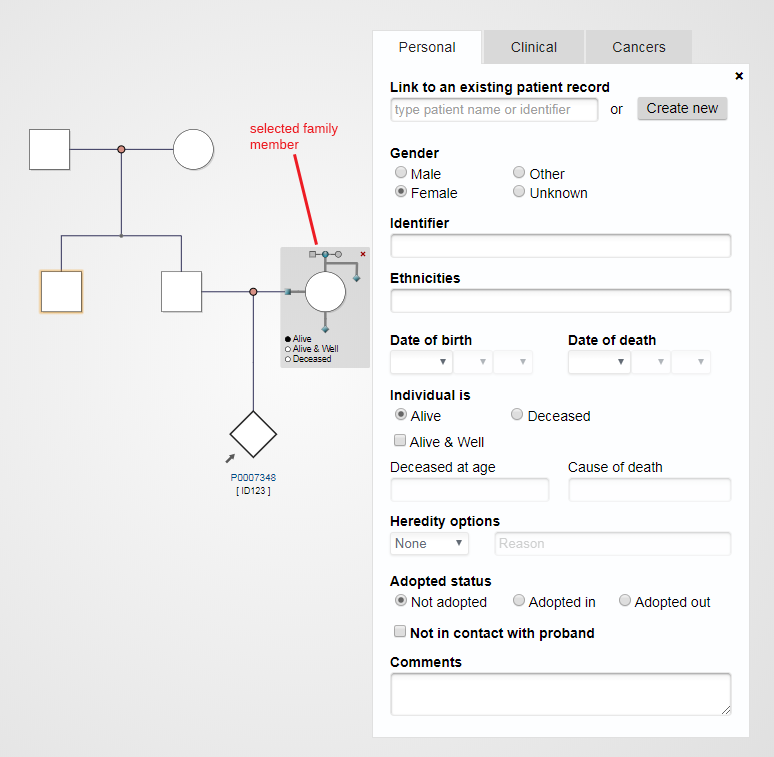
Clicking on a node will open up a window where you can enter information about that family member; click on Create new to make a new record for this person
Next click on the PhenoTips ID (make a note of this for your records) and you will be taken to the new, blank record. Click Edit and fill in all the information for this record, making sure to click Save when done.
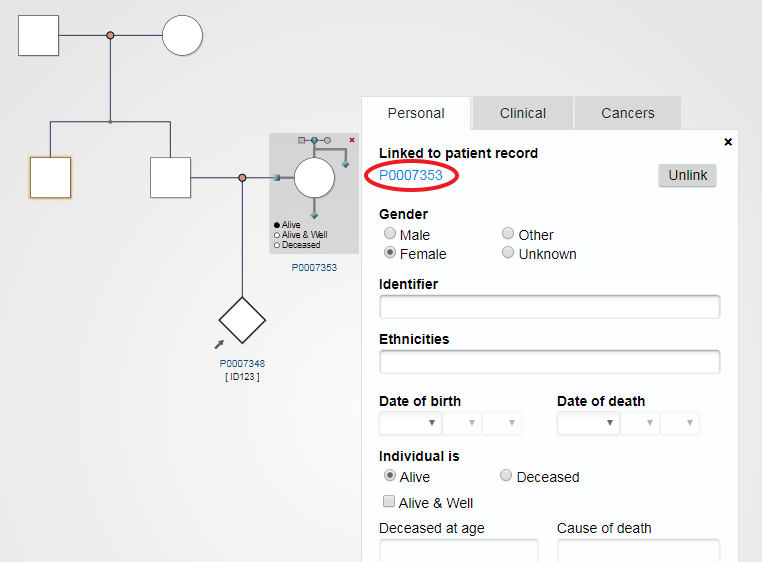
The PhenoTips ID is highlighted in blue after you have clicked “Create new”
This opens in a new window
You can then close this browser window as the Pedigree Editor will still be open in a separate window in your browser. Continue to create records for all other family members in the same way.
Once the pedigree is complete, click Save and then Close to return to the original index case record.
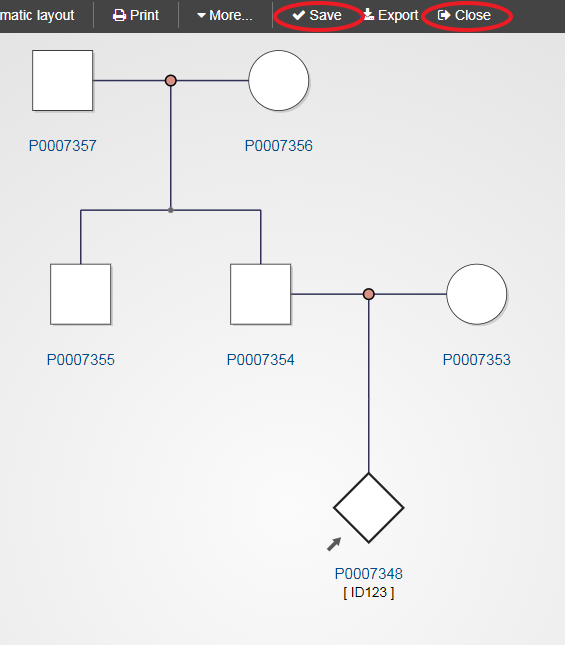
After all the records have been completed, click “Save” and “Close” to take you back to the original record
5.1.How to link patient records to an existing pedigree
To link an entry to an existing pedigree (for example after bulk-uploading your data and receiving the corresponding RD-Connect patient identifiers), you will need to do the following steps.
1- Enter the Index case registry
2- Go to “Family history and pedigree”

3- Add the desired relative to the pedigree by introducing the corresponding PhenoTips ID into the “Link to an existing patient record” section.

4- Remember to save your changes before leaving the page.
This process will automatically assign the corresponding Phenotips Family ID to this relative.
6.Entering HPO terms
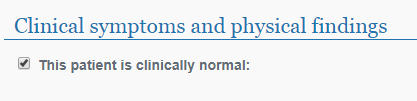
If the person is an unaffected relation, please tick the This patient is clinically normal checkbox and move on to the next section.
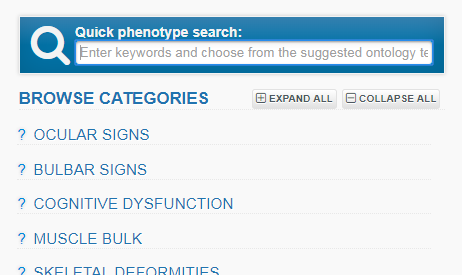
You may search for phenotypic information not included in the selected form by typing a feature in the Quick Phenotype Search box. Suggestions from the HPO ontology will appear and you can choose the most appropriate one.
In order to avoid duplications, please only enter the most specific HPO term describing each of the symptoms (e.g. muscle weakness and distal muscle weakness: only select and enter the second one, which is more specific)
You can also browse the HPO terms in the form itself, clicking on a category to open up further choices, and the blue triangular symbols to expand the hierarchy of HPO terms further.
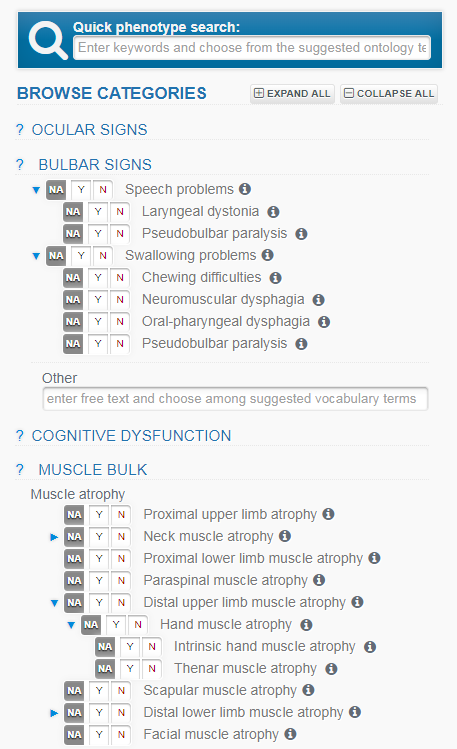
The HPO terms listed here will vary depending on the Study you selected. By choosing “None” for Study when you create a new record, ALL HPO terms will be listed here.
We ask that you submit a minimum of 5 HPO terms here, if possible, as any less renders the record less useful when using the analysis platform to compare and match cases.
If the specifc HPO term you are willing to introduce does not appear in the browser selection, please go to https://hpo.jax.org/app/ to search for the most appropiate term.
If the proper term is not listed in the ontology, you can still entering the symptom in “free text” selecting the last option of the dropdown in PhenoTips. In this case, we strongly recommend to propose a new term request to the HPO ontology by submiting an issue on HPO Github.
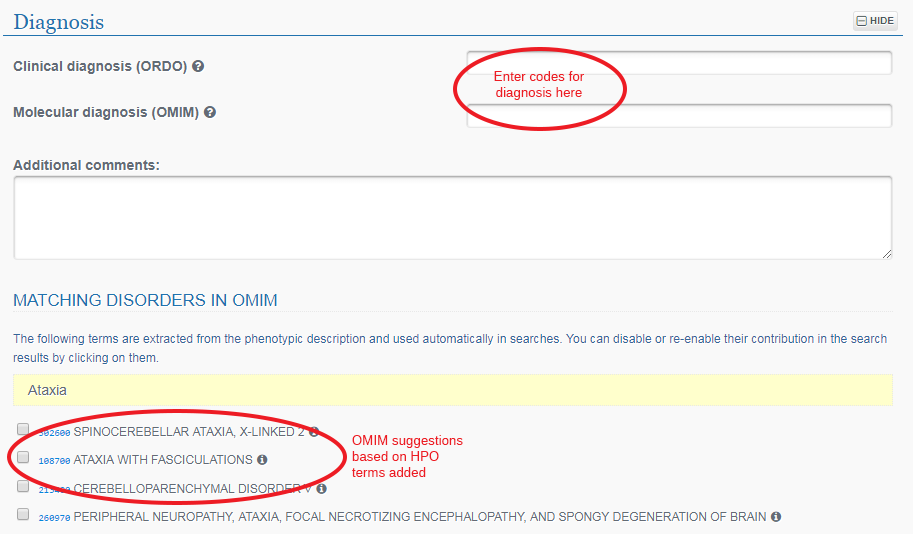
Under Diagnosis you can type in any confirmed diagnosis and choose from the pop-up OMIM descriptions. You may also select from the suggested diagnoses which have been generated based on your entered phenotype data.
Click on the Save button at the very top of the page to save your record.
7.Sharing the record
This is very important as otherwise only you will be able to see record; not even other members of your team will be able to see it unless you do this.
You now need to decide who can view/edit your record. At the top right of the form it will say, This case is owned by You and is Private. It is shared with No collaborators. Click on Modify permissions, next to this statement.
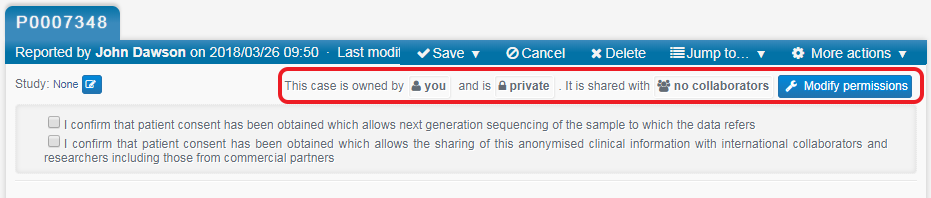
This record is initially only accessible to you; not even other members of your group
In the Ownership section click in the “Transfer ownership to one of your groups” and add your own group here. This is very important, otherwise you won’t be able to see your own record.
You can leave Global Visibility as it is (default is Private).
Under Collaborators you will be able to share your record. You can type the name of another user or group into the relevant fields and select the appropriate pop-up.
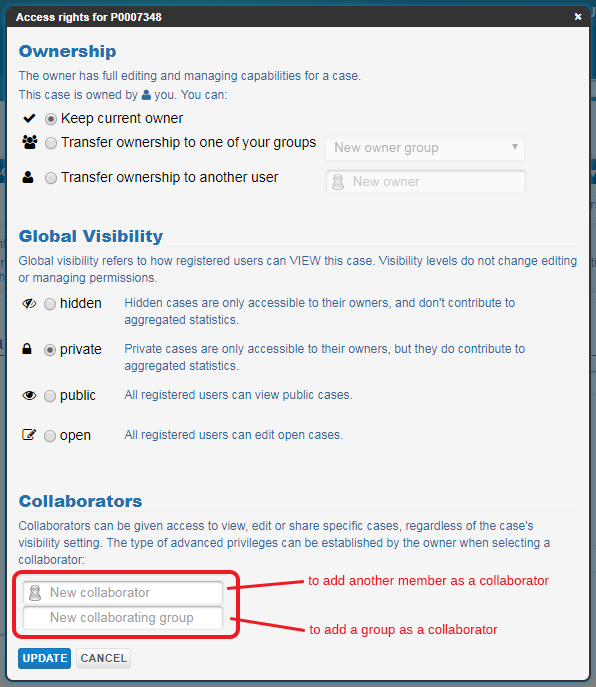
Type the name of another user or group in the Collaborators fields and select the correct one from the list that pops up
Use the drop-down menu to give permission to those with whom you shared data to either view OR view and modify the record.
Click Update.
8.After the case has been analysed
Once the case has been analysed through the RD-Connect Genome-Phenome Analysis Platform (https://platform.rd-connect.eu/genomics/ ), you can enter information concerning its resolution status (solved, unsolved or with candidate gene/variant(s) under functional studies).
Use the Analysis status section to keep track of your analysis stage:
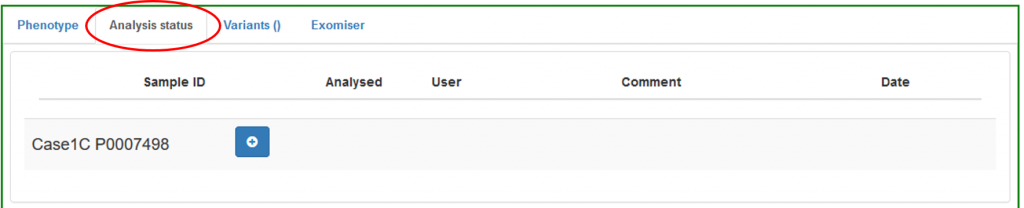
Press the + button to update your entry and enter the current analysis status:
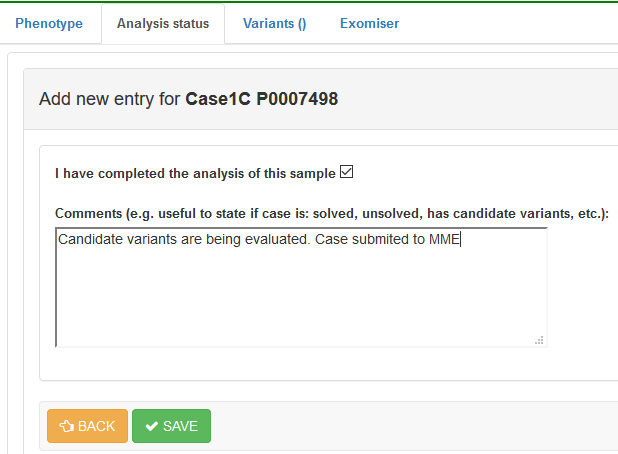
Save the record. You will be able to see and update this information at any time in this same section.
8.1.After the case has been solved
Once a case has been analysed and solved, the causative(s) variant(s) should be identified and TAG in the RD-Connect Genome-Phenome Analysis platform and the case status updated in PhenoTips. Therefore the following 3 steps should be done:
- Identify and TAG the causative variant in the genomic platform
- Enter the corresponding OMIM and ORDO codes
- State the case as “Solved”
1. IDENTIFY AND TAG THE CAUSATIVE VARIANT
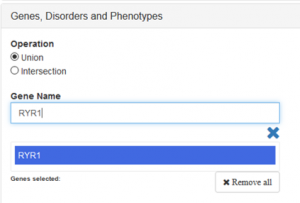
To identify and TAG the corresponding causative variant(s), you should go to the RD-Connect Genome-Phenome analysis platform (https://platform.rd-connect.eu/genomics/ ), and run the query with the addequate filters to get the causative variant(s) in the results section.
We suggest to filter by the “gene name” to restrict the query; as you type a list of genes will appear for you to choose from.
Then select the causative variant from the result section and click the TAG button
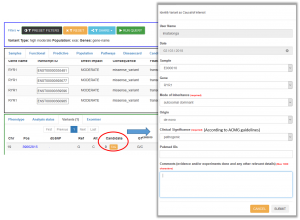
A form will appear with different dropdowns to fill in.
We strongly recommend you to follow the ACMG standards and guidelines for the interpretation of sequence variants (PMID:25741868) and to fill in the clinical significance of the variant in the form. Intervar is a bioinformatics software tool for clinical interpretation of genetic variants by the ACMG/AMP 2015 guideline that might help you in this process (http://wintervar.wglab.org/). This information will be stored in the RD-Connect database and will be accessible through the data submission module.
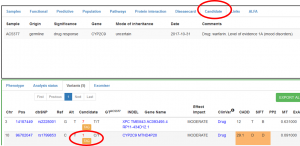
Once TAGed, you will be able to consult the information entered (from you or other RD-Connect users that might have TAG the variant) selecting the variant and the “candidate” tab in the upper pannel (the number of users that have tagged the variant appear in red next to the TAG button):
2. ADD OMIM AND ORDO CODES
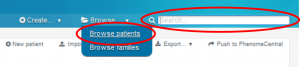
Go to PhenoTips, select the solved index case you want to update either by browsing all your patients or entering the corresponding PhenoTips ID in the search box.
Click on EDIT at the top of the window to enter the edition view

Open the DIAGNOSIS section to enter the corresponding OMIM and ORDO descriptions; as you type a list of terms will appear for you to choose from.

3. STATE THE CASE AS SOLVED
Open the CASE RESOLUTION section and tick the case as solved

Remember to save your changes before leaving the page.
8.2.Data sharing and matchmaking
RD-Connect GPAP has integrated different tools that enable to match challenging patient diagnostic cases with other patients or genomic data in a federated network of collaborating
projects and centres:
- Matchmaker Exchange
- Beacon network
8.2.1.MatchMaker Exchange
Matchmaker Exchange (MME) was launched to provide a robust and systematic approach to RD gene discovery through the creation of a federated network connecting databases of genotypes and rare phenotypes using a common application programming interface (API). For more information visit https://www.matchmakerexchange.org/
To allow patient internal and external matching through MME you need to follow the following steps:
BEFORE STARTING THIS PROCESS ENSURE THAT YOU HAVE THE APPROPIATE PATIENT INFORMED CONSENT FOR DATA SHARING.
1. Set the patient as matchable in the data management module
If you have not previously selected the patient as matchable during the submission data process please go the the RD-Connect data management module and change the participant MME status to matchable.
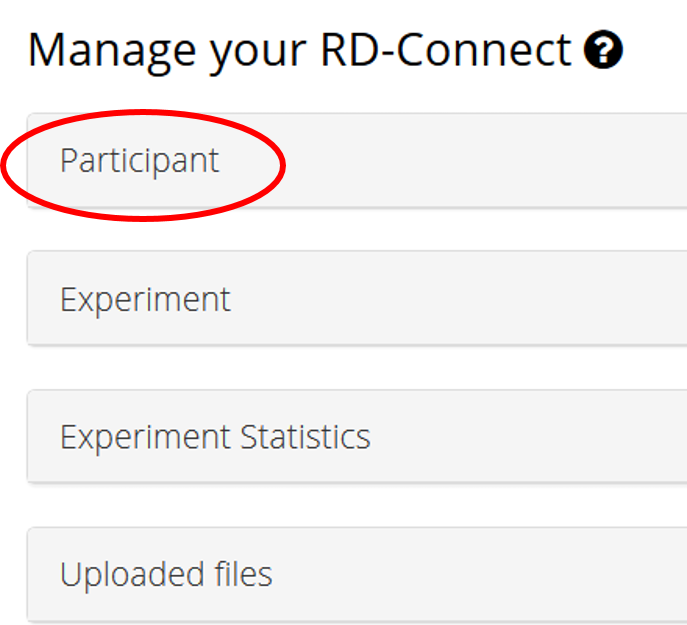
Access your patient information view selecting Participant in the Manage your RD-Connect section at the bottom of the page
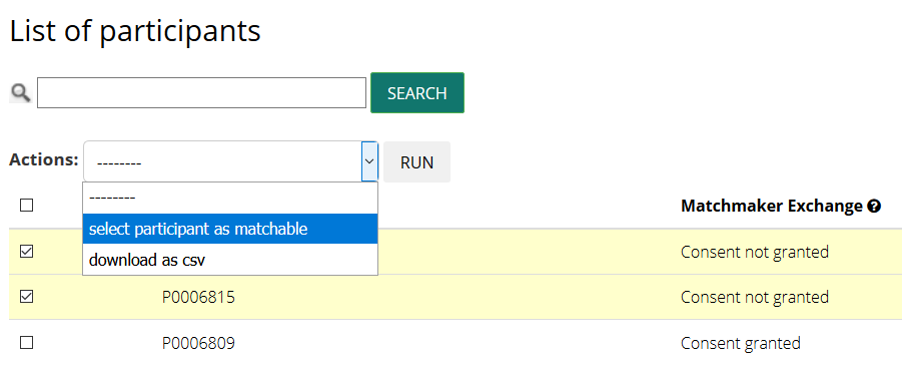
Select the IDs of the patients you want to allow matchmaking
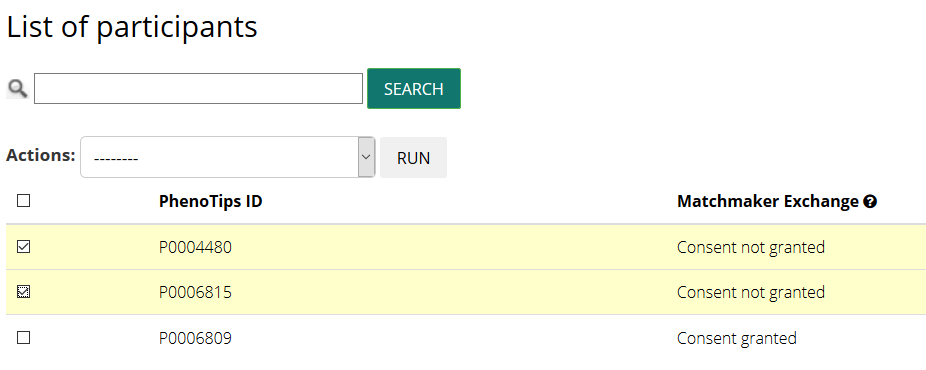
and change their status clicking on select participant as matchable in the Actions dropdown
2. Push the data through MME
Go to the RD-Connect GPAP, enter the RD-Connect ID of your patient in the sample section and click in the MME icon. A form will appear pulling all the information you have already entered: clinical symptoms are extracted from PhenoTips and information concerning the genes is extracted from PhenoTips and the TAG functionality of the GPAP:
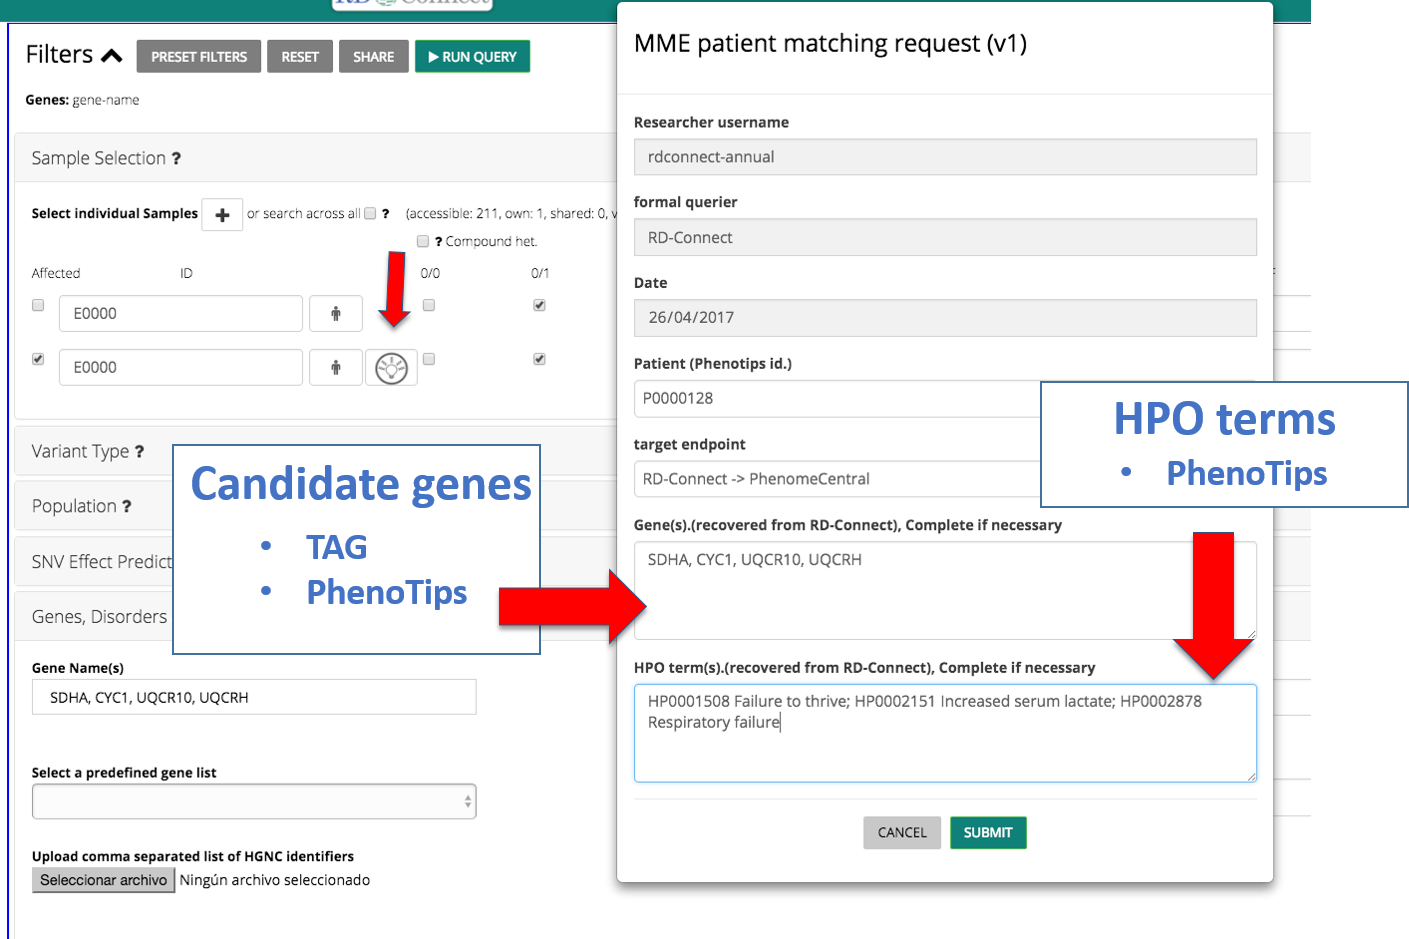
In the target endpoint section you will be able to select if you want to match your patient internally (within the RD-Connect database) or externally to the whole MME networks through PhenomeCentral.
You can also add additional HPOs or gene by typping directly in the form.
Once you have checked all the information, you can submit the data clicking in submit. The application will return the list of patients that matched your query ordered by MME score. MME score is defined from 0 to 1, being 1 a perfect match. This score is divided into two part 0.5 for the gene match and 0.5 for the phenotypic match.
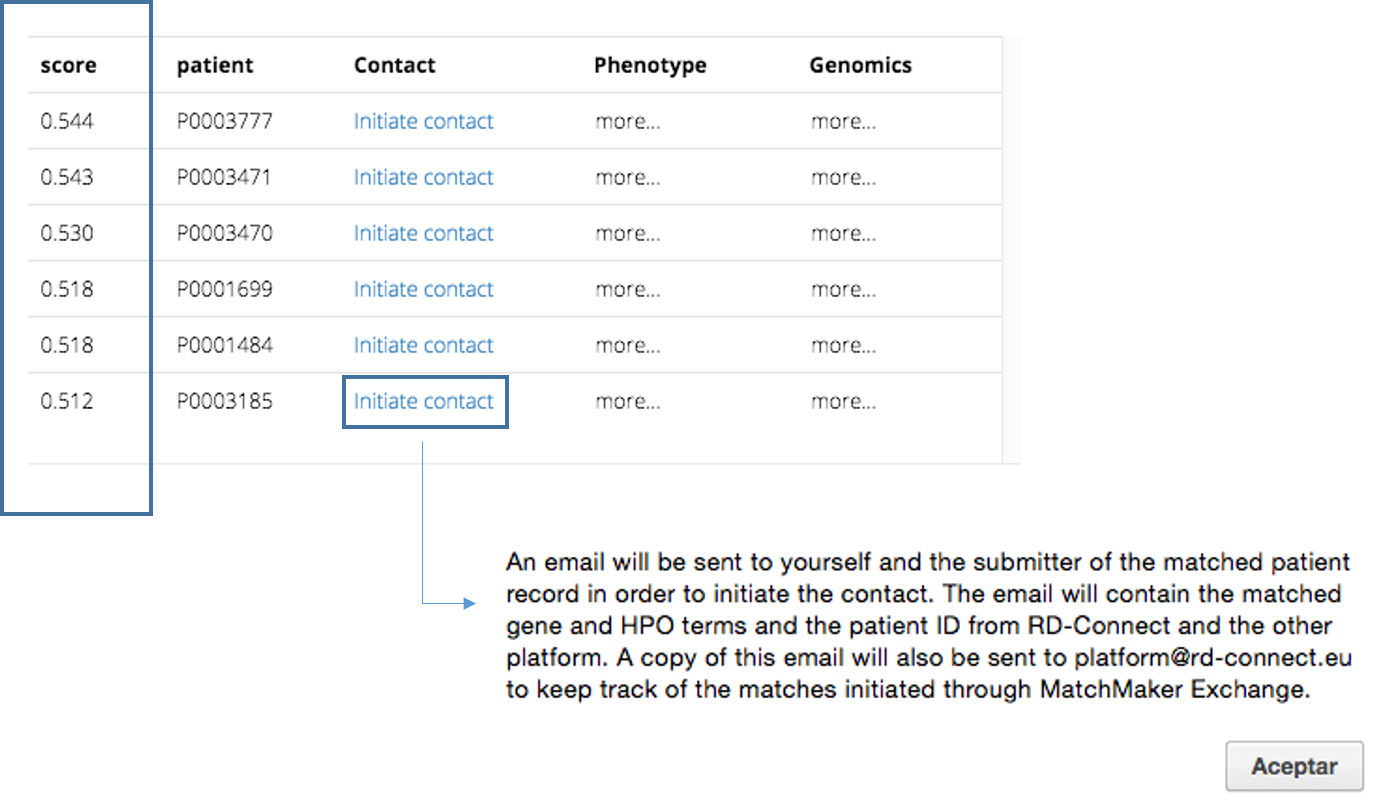
If you have a positive match and you want to contact the corresponding data owner, click to Initiate contact and an email will be send to you and the corresponding submitter to initiate a possible collaboration.
8.2.2.Beacon Network
The Global Alliance for Genomics and Health’s “beacon” application programming interface has been implemented, which enables querying of the presence or absence of single variants in the RD-Connect cohort. This beacon is connected to the Beacon Network which is a search engine across the world’s public beacons. It enables global discovery of genetic mutations, federated across a large and growing network of shared genetic datasets.
You can easily submit your variant of interest to the Beacon Network selecting GA4GH beacon at the chromosome position level from the results section of the RD-Connect GPAP .
![]()